- Please select your languages, order to get all infomation that you need
- English العربية Le français Deutsch lingua italiana 日本語 한국어 Português (Portugal, Brasil) русский Español

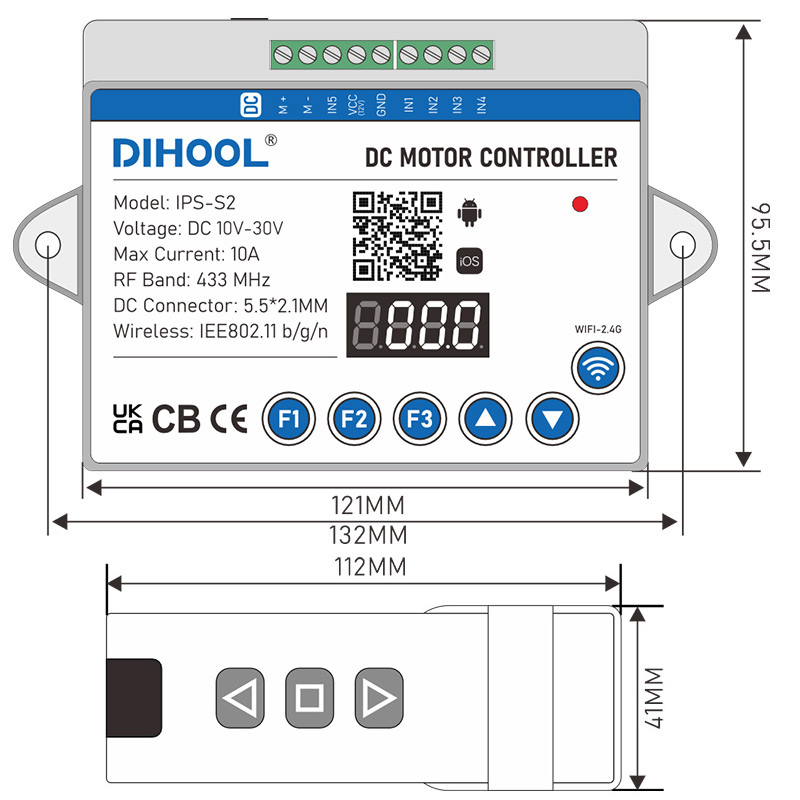

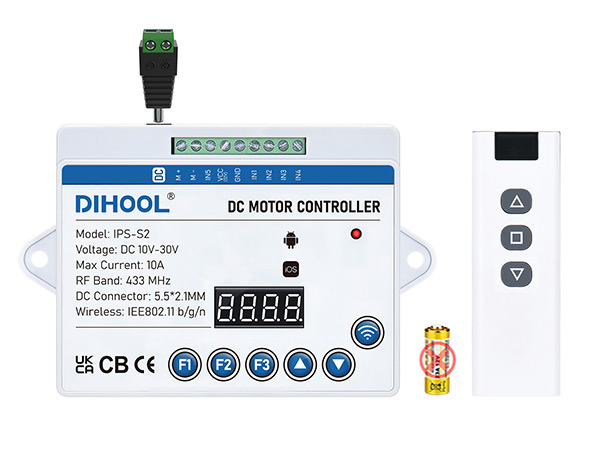
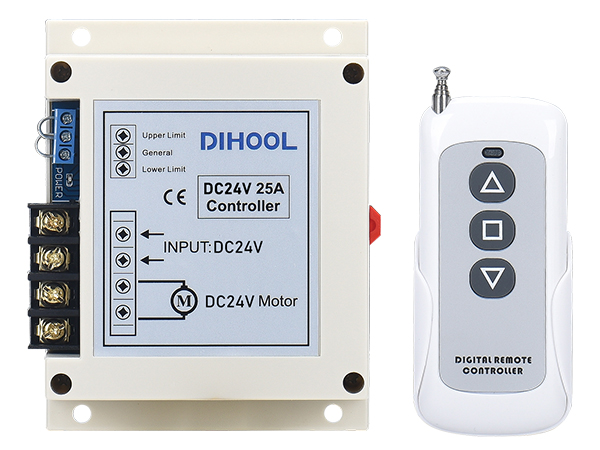
Model: IPS-S2
Input Voltage: DC 10V-30V
Output Voltage: 20~93% Input Voltage Adjustable
Maximum Current: 10A
Receiving Frequency: RF433MHz
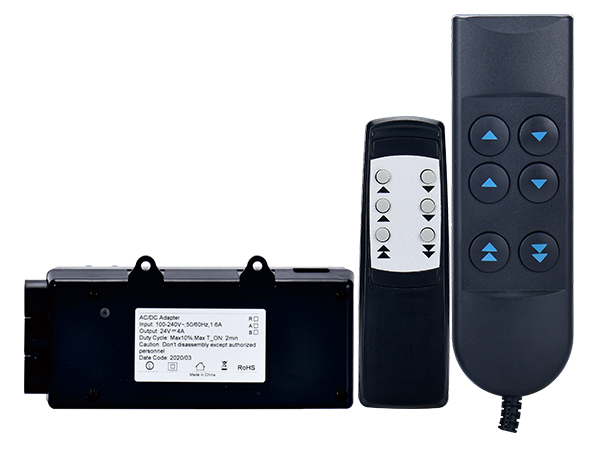
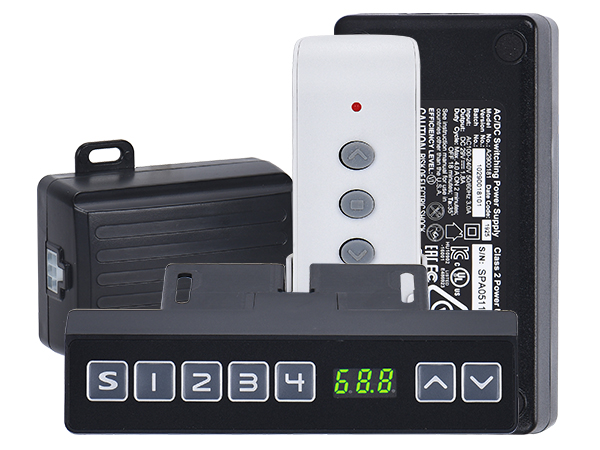
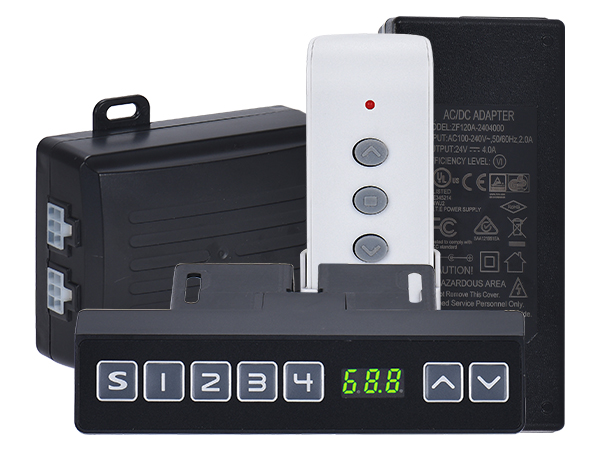
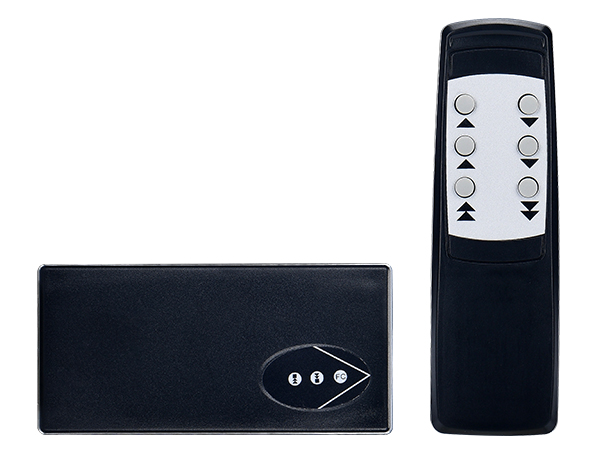
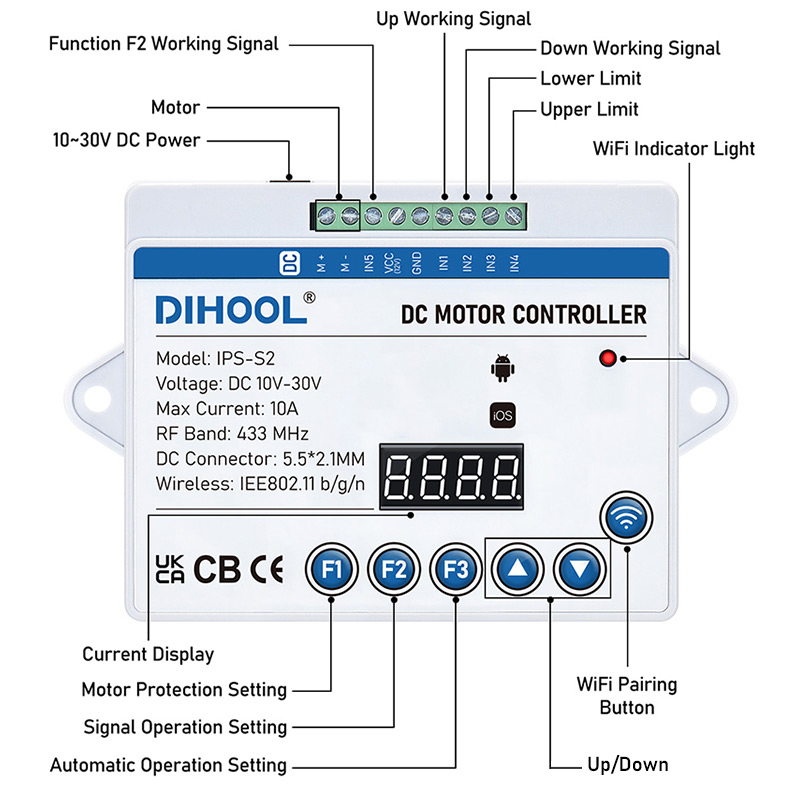
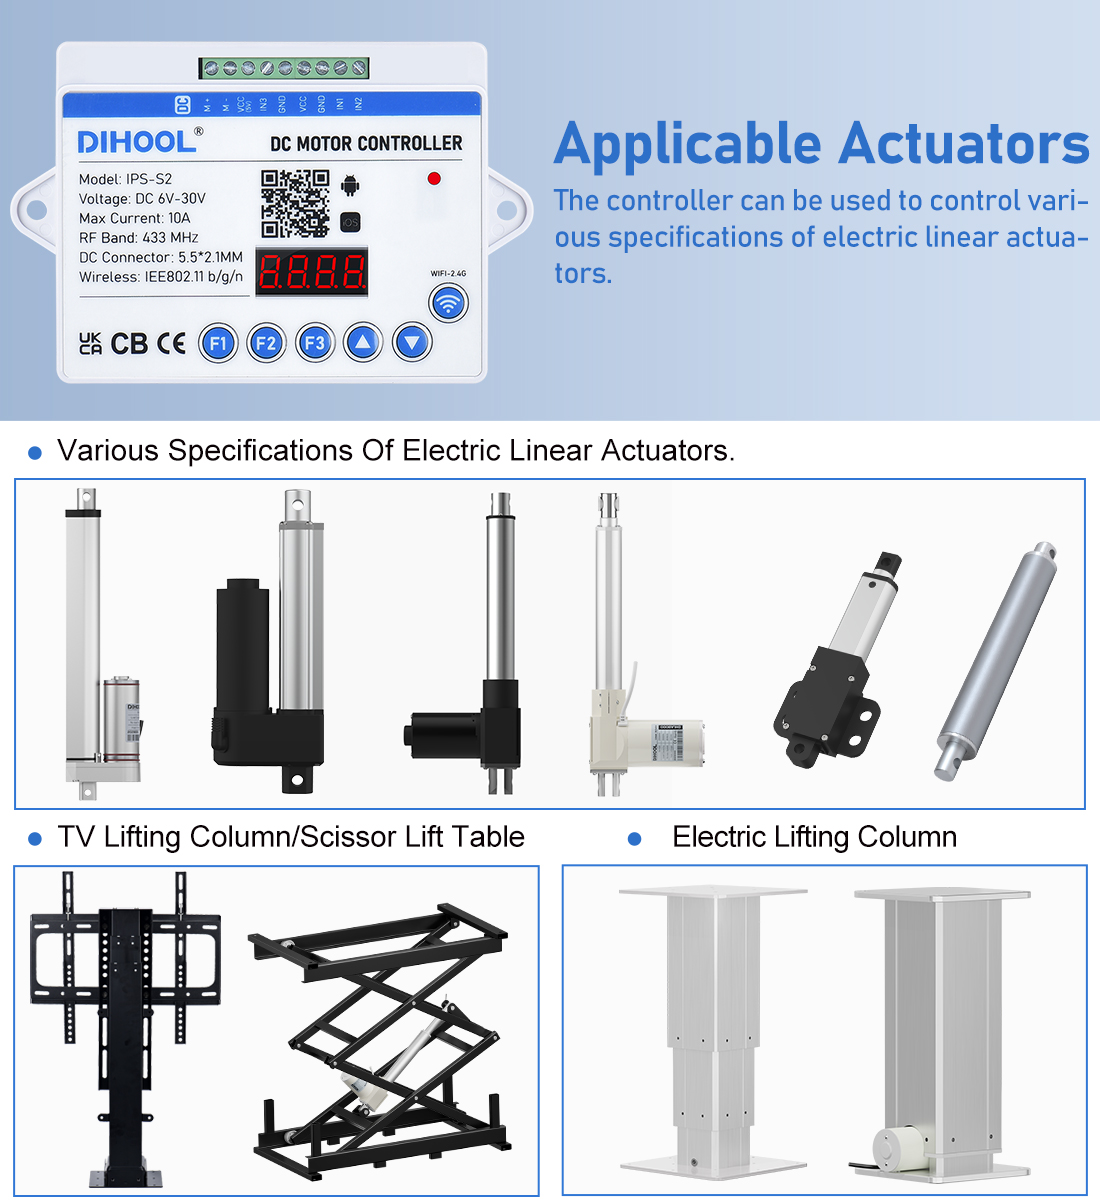
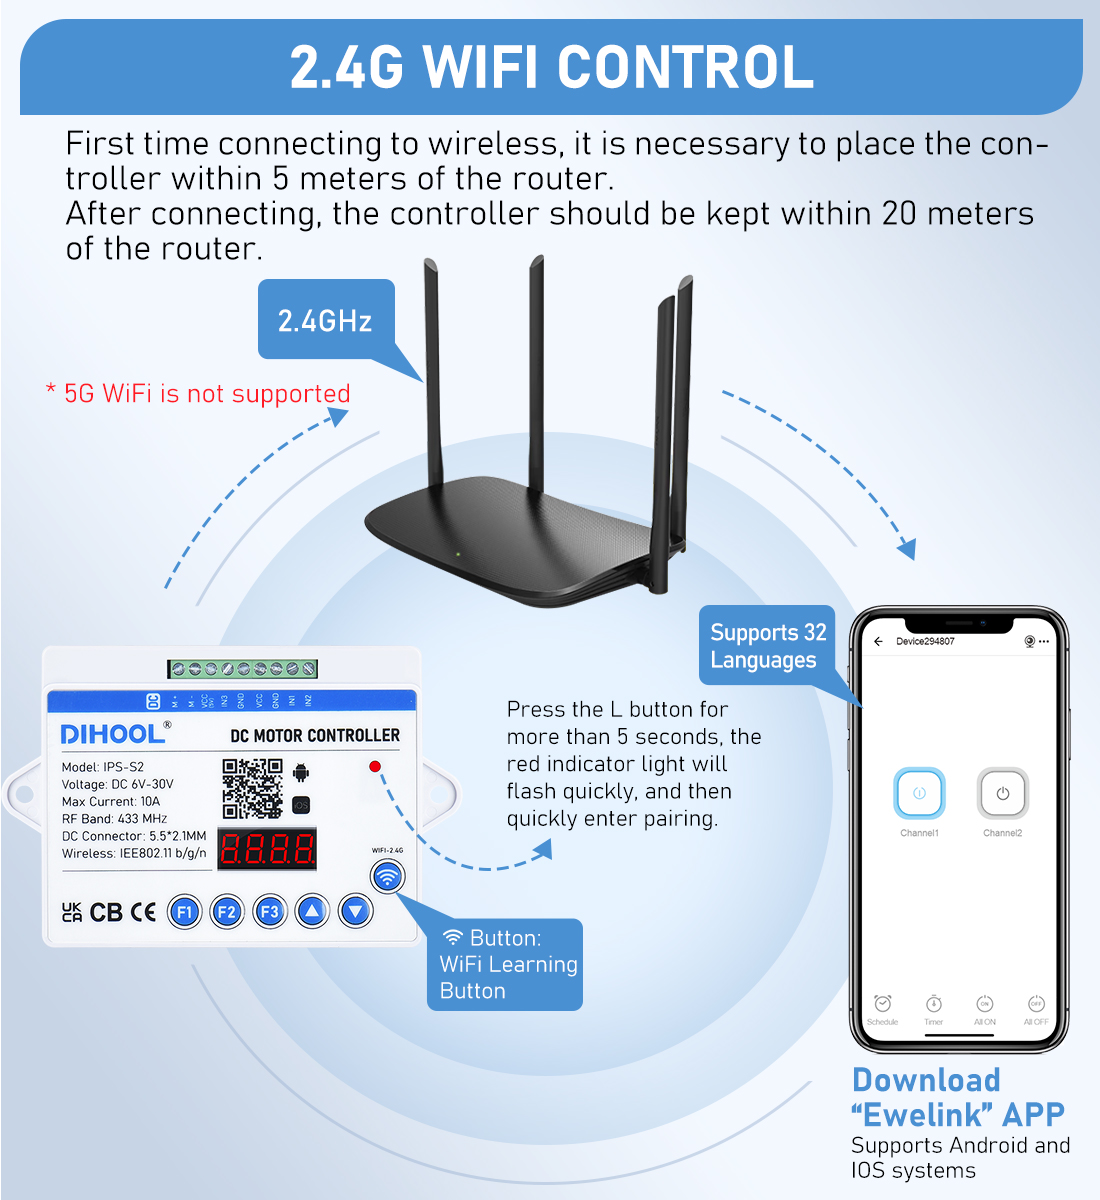
IPS-S2 motor controller that integrates infrared / radio frequency / WIFI / button control, mainly used to control electric linear actuators. The controller is compatible with voltage of DC10V~30V, maximum current of 10A. The positive and negative poles need to be wired according to the wiring diagram. If the positive and negative connections are not correct, it will not burn the controller. For example, 60W linear actuator, please choose 60-90W power adapter/switch power supply. If use smaller power, the motor will not working. The controller can be used to control various specifications of electric linear actuators. WIFI module can be controlled through the "eWeLink" APP, and only supports 2.4G WIFI. There are 6 buttons F1, F2, F3,▲ , ▼, ![]() on the controller for adjusting various functions. Please refer to the following for detailed instructions. The ▲/▼ button controls the forward and backward movement of the motor; The
on the controller for adjusting various functions. Please refer to the following for detailed instructions. The ▲/▼ button controls the forward and backward movement of the motor; The ![]() button learns WIFI.
button learns WIFI.
| Model | IPS-S2 | DC Connector | 5.5*2.1MM |
| Input Voltage | DC 10V-30V | Receiving Frequency | RF433MHz/2.4GHz |
| Output Voltage | 20-93% Input Voltage Adjustable | WIFI Protocol | IEE802.11 b/g/n |
| Max Current | 10A | Remote Control Battery | 23A 12V |
| Current Monitoring Accuracy | ±0.3A | Working Temperature | -20℃~+70℃ |
| Power Consumption | <3W | Working Humidity | 10%~90%RH (NO CONDENSATION) |
| Input Signal Type | NPN |
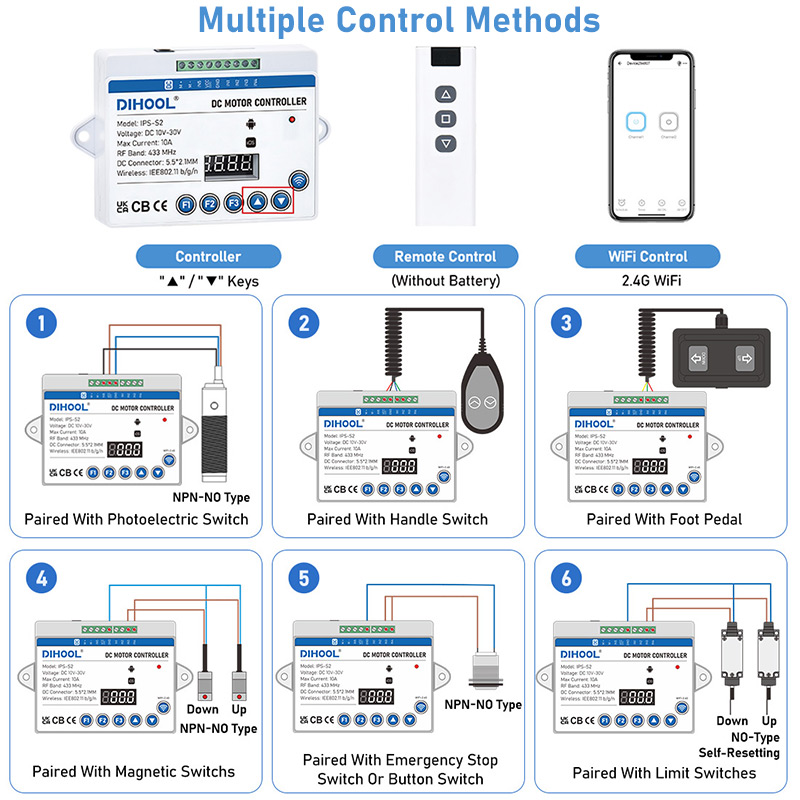
1. Controller button control: Press the ▲ button to up and the ▼ button to down. If not correct, please switch to connecting the motor cable.
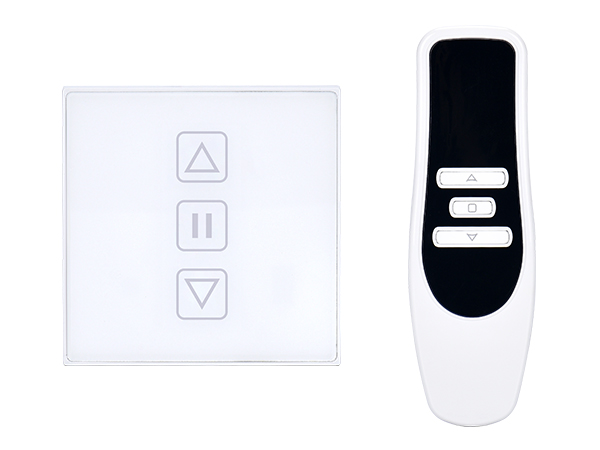
2. RF433 remote control: It can be adapted to the RF433 remote control (with three buttons for forward, pause, and backward), and one controller can be equipped with 8 remote controls. (Provide 1 remote control by default)
3. Infrared remote control: Each infrared remote control can be controlled
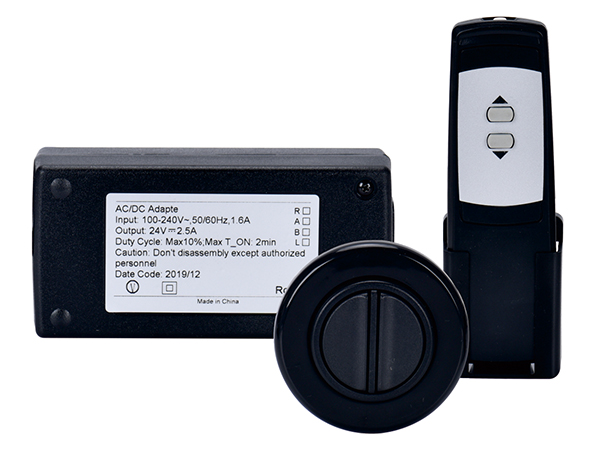
4. Manual controller: optional with 2.5 meter manual controller for control (press move)/optional with foot controller for control (press move)
5. WIFI control: You can use the L button to connect 2.4G WIFI for lifting control. (First time adapting to WIFI, please approach the router)
6. Button control: Can be controlled using industrial button switches
7. Current limiting control: Set the maximum current of the controller through the F1 button. When the motor exceeds the current, the motor will stop

| FUNCTION F1: MOTOR PROTECTION SETTINGS Press and hold the F1 key for 3 seconds to enter the F1 sub-function settings, click F1 to switch in the sub-functions, and hold the F1 key for 3 seconds to exit the setting (press "▲" to increase / "▼" to adjust the value) | |||||
| Code/Subfunction Name | Subfunction Parameter Description | Value | Default Value | Unit | |
| A | Overcurrent Protection | Upward overcurrent protection | A010~A100 | A04.0 | (Amp) |
| b | Downward overcurrent protection | b010~b100 | b01.0 | (Amp) | |
| C | Operation Mode | C-1 Jogging, C-0: Self-holding, U-1 time-delay | C-1~C999 | C000 | (Seconds) |
| d | Stall Detection Protection | Downward Stall Detection Protection | D0.0~D9.9 | D0.6 | (Amp) |
| E | Upward Stall Detection Protection | E0.0~E9.9 | E0.0 | (Amp) | |
| F | Stall Reverse Time | Obstruction rebound duration | F000~F999 | F001 | (Seconds) |
| G | Stall Protection Time-delay Intervention | Set the time for delayed intervention of stall protection | G0.0~G3.0 | G0.30 | (Seconds) |
| H | Percentage of QV Voltage Regulation Range | Downward voltage regulation range (20%-93%) | H000~H093 | H093 | (%) |
| J | Upward voltage regulation range (20%-93%) | J000~J093 | J093 | (%) | |
| L | Display Brightness Adjustment | Screen brightness ranges from 1 (dim) to 8 (bright) | L001~L008 | L005 | |
| P | Operation Mode Of Wired Controller | Foot switch / wired controller (0: Jogging, 1: Self-holding) | P 0 / P 1 | P 0 | |
| t | Screen Off Time | The default time is 5 minutes | t000~t999 | t005 | (Minutes) |
| Lo | Soft Stop | 0: Turn Off, 1: Turn On | Lo 0 / Lo 1 | Lo 0 | |
| FUNCTION F2: SIGNAL OPERATION SETTING Press and hold the F2 key for 3 seconds to enter the F2 sub-function settings, click F2 to switch in the sub-functions, and hold the F2 key for 3 seconds to exit the setting (press "▲" to increase / "▼" to adjust the value) | |||||
| Code/Subfunction Name | Subfunction Parameter Description | Value (Unit) | |||
| A | Up Working Time | Motor Up Working Time | A000~A999 | (Seconds) | |
| b | Pause Time | Motor Pause Time | b000~b999 | (Seconds) | |
| C | Down Working Time | Motor Down Working Time | C000~C999 | (Seconds) | |
| d | Operation Mode 0: Motor Working 1: Motor Not Working | 0: Signal Present, stop. Signal disappear, execute actions A,b,c 1: Signal Present, stop after executing action A. Signal disappear, execute actions b and c | d000~d001 | / | |
| FUNCTION F3: AUTOMATIC OPERATION SETTING Press and hold the F3 key for 3 seconds to enter the F3 sub-function settings, click F3 to switch in the sub-functions, and hold the F3 key for 3 seconds to exit the setting (press "▲" to increase / "▼" to adjust the value) | |||||
| Code/Subfunction Name | Subfunction Parameter Description | Value (Unit) | |||
| A | Up Working Time | Motor Up Working Time | A000~A999 | (Seconds) | |
| b | Pause Time | Motor Pause Time | b000~b999 | (Seconds) | |
| C | Down Working Time | Motor Down Working Time | C000~C999 | (Seconds) | |
| d | Pause Time | Motor Pause Time | d000~d999 | (Seconds) | |
| E | Number Of Cycles | The Number Of Cycles Of The Motor | E000~E999 | (frequency) | |
| F | Cycle Operation Mode: 0-Close, 1-Start | 0: Close Cycle Operation, 1: Start Cycle Operation Press the "▲" / "▼" To start, press again to close | F000/F001 | / | |


| File name (click to view); | file type | File Download |
|---|---|---|
| DHSMS051Y Z-S2-V1.0-250220--.pdf |

|
|
| DHSMS051Y Z-S2-V1.4.0.pdf |
|
| File name (click to view) | file type | File Download |
|---|---|---|
| S2.html | HTML |
|